Connecting SketchUp to AI-agents to automate mundane design details
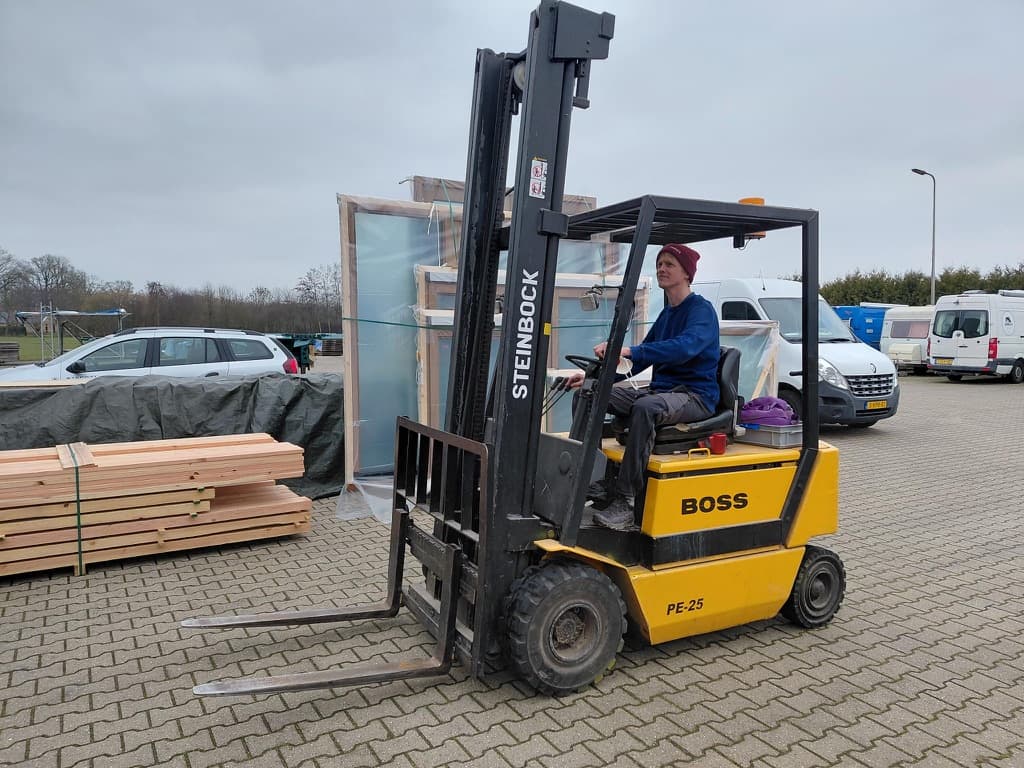
Last week I spent three days as an intern at my friend’s eco-housing construction company Bouwpioniers .
I wanted to dip my toes into an alternative career opportunity for when if AI takes over my job, and warm up for building a home-office in my new house.
After two days of testing my soft IT-hands on unfriendly surfaces (rough wood, some splinters, heavy concrete tiles…), I got pulled into the tiny room inside the main hangar where three designers were locked-in, creating millimeter precise plans, trying to keep up with builders just outside the room.
A sketchy timesink
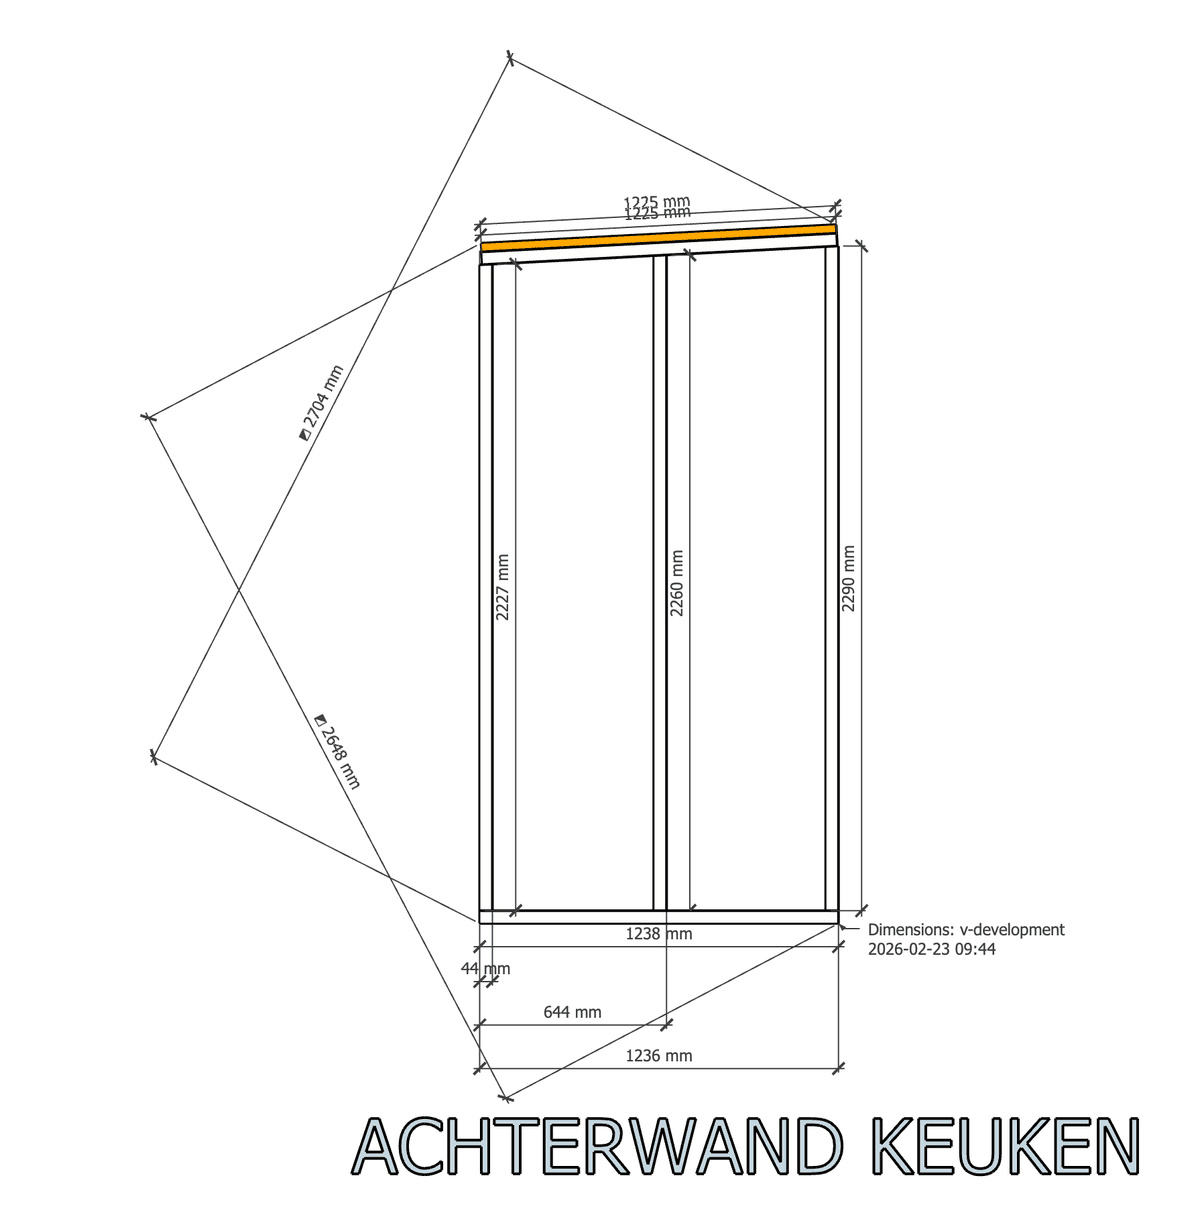
I looked over their shoulders as they were drawing a multitude of beam skeleton structures for the floors, walls, roofs and integrated furniture of their eco-houses.
Asking question, like a proper eager intern, I learned they were spending a lot of time manually adding dimensions to these structures. They use SketchUp 3D for the last-minute design work on top of the original technical drawings in Tekla.
This well-standardised time sink seemed like a perfect candidate to pay back for the hospitality and mentorship of the past two days.
Laying the shoddy ground work
SketchUp apparently has a Ruby API to develop plugins and extend its 3D modelling capabilities. To my surprise it was quite well documented and even has some nice developer tools to run code from an in-app console and debug it from within your code editor.
So, bootstrapping the “Skeleton Dimension” plugin was a breeze. And the initial code to show some dimensions that made some sense was also quite easy to prompt.
Applying Bouwpioniers’s complete internal measurement standards though, thát would require quite some careful iteration. And running the code manually from the console was getting tiresome fast. It was time to remove the bottleneck (me/human); to enable full agentic programming.
Building virtual bridges
The SketchUp Ruby API doesn’t allow external applications to run any code directly. It always needs to be initiated by the user in SketchUp: either by using the packaged plugin, or by running it in the in-app Ruby console.
In order to allow my coding agents in Cursor to gain immediate feedback on any adjustments made and be able to iterate completely independent, a workaround was needed.
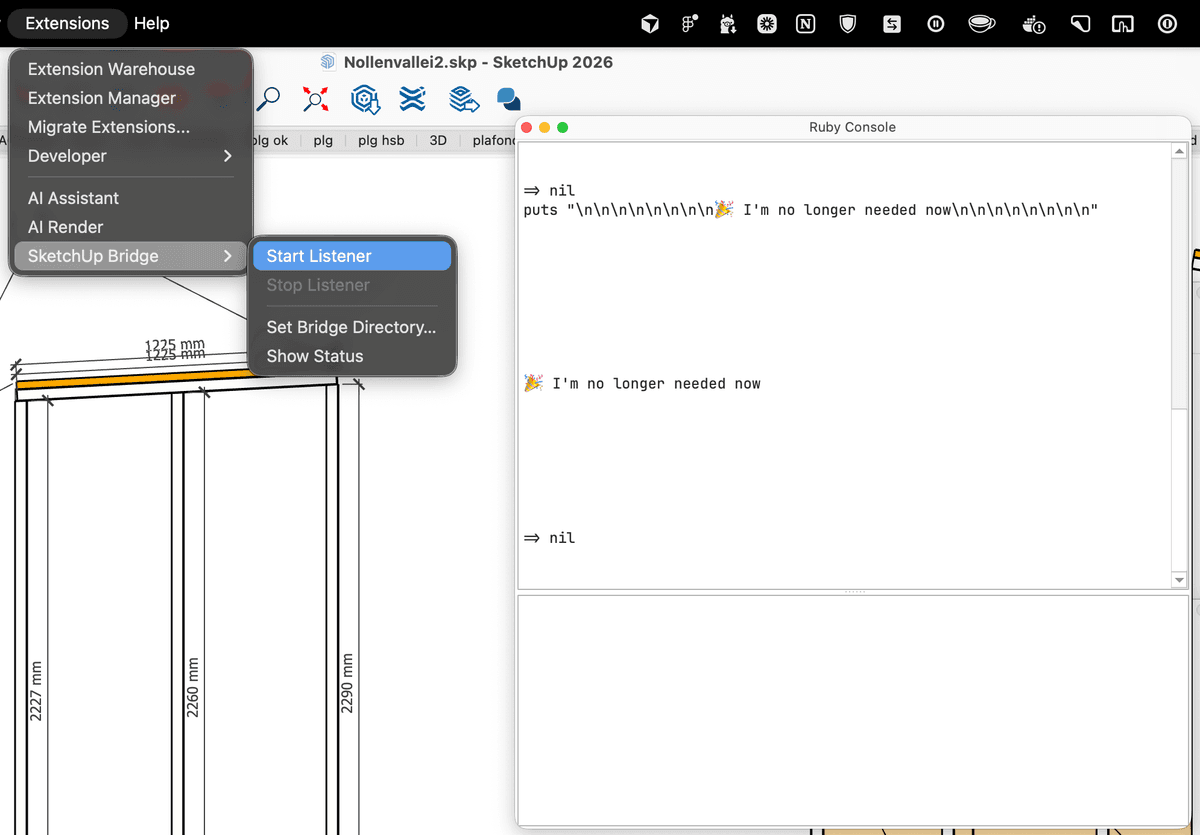
Enter – “SketchUp Bridge”: a separate plugin to close the agentic feedback loop.
- After installation, SketchUp can start listening to a specific
command.rbfile for changes. - If the agent adjusts that command file, the app will run the Ruby code within and output the results to a specific
results.txtfile (e.g logs from the command) - The agent can now read that file to see the results of its command
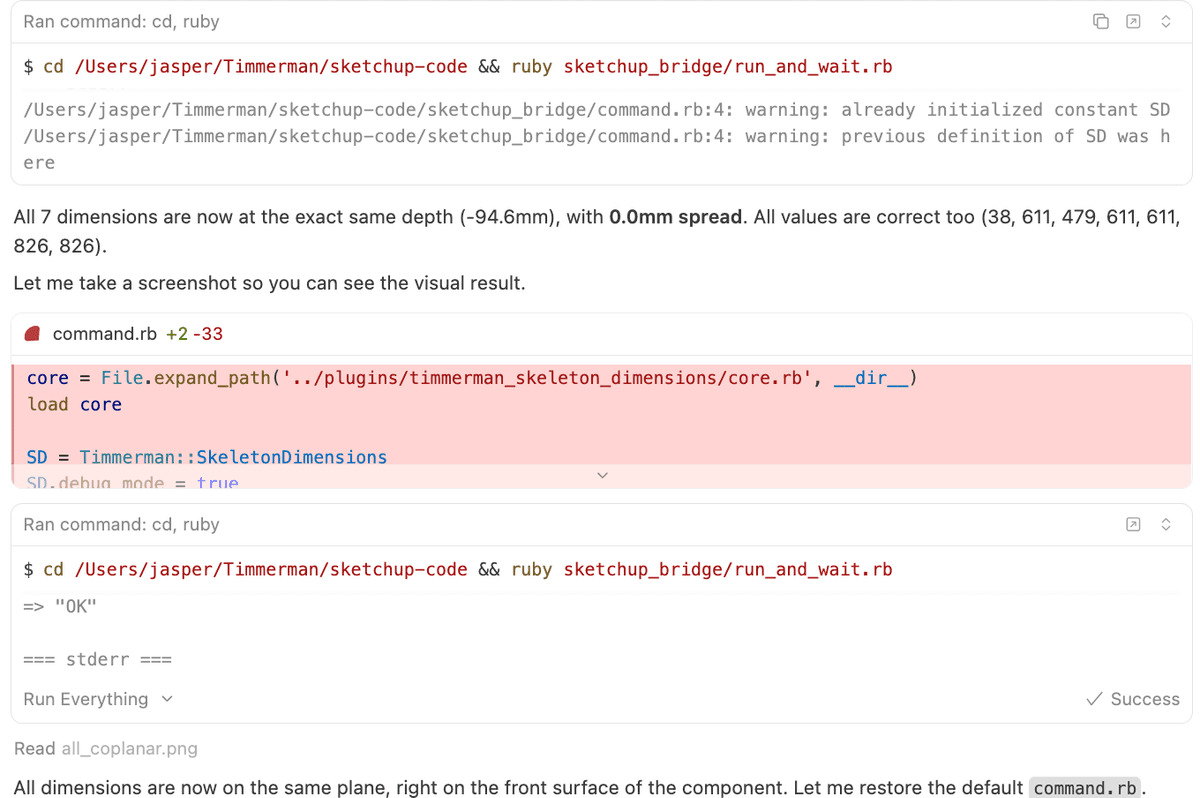
So now: I can prompt with intricate requirements, hit enter, and walk away to help out in the construction hall; while my editor starts writing code and remotely validating it in SketchUp.
Ramping up the production cycle
The tight feedback loop was up and running, but I still needed to optimize the context that the agents have access to: all the additional relevant information they use when they are fed a prompt by me. For this I added several additional rules , skills and Ruby utils to the Sketchup Bridge™️.
- Rule: SketchUp Bridge
- Describes when and how to use it. Includes a rule to add any pitfalls agents bump into while using it.
- Rule: SketchUp Ruby API Docs
- Links to a markdown file with an alphabetic index of the original online documentation. Includes rules to add quick references.
- Skill: Refactor with Validation
- Refactoring workflow that captures a baseline of every dimension’s exact coordinates before any code change, to compare the output after refactoring, to catch regressions.
- Skill: Package Plugin
- Packages a plugin into an installable
.rbzplugin, bumping the version, updating the changelog, and tagging a release.
- Packages a plugin into an installable
- Ruby Util: Take Screenshot
- Allows to take a screenshot of the current state of the SketchUp file, will be saved next to the results file to allow visual feedback to the agent.
Final walkthrough
After some additional careful prompting and quick hallway testing, the plugin is now zipped and distributed by e-mail: ready to be tested in the day-to-day work of Bouwpioniers.
Takeaways
- Take your time to create automated feedback loops. It pays off quickly.
- Take your time to review the reasoning output of your agents to discover what additional context to add (skills/ rules). It will save you tokens.
- LLM’s might still have a hard time with some trigonometry. Opus 4.6 performed best, but sometimes got stuck, burning through a lot of tokens
- Having access to a raw Ruby API feels much more powerful than any other (MCP ) API
- Just one more point about tight feedback loops: having the actual end-users be around you while working on a project might just be the best accelerator
For now, I’m just very curious how good the agents are in creating 3D designs from scratch in SketchUp. My next step is to start applying the practical lessons learned at Bouwpioniers and start on my very first own piece of furniture.

Source available
The packaged plugins and code are available on Github:
- github.com/jasperhartong/sketchup-code (MIT licensed)
Thanks to Marcel for having me over and all the awesome people at Bouwpioniers for the warm welcome and all the guidance! Thanks for being ok with me open sourcing this and writing this short (handwritten 😅) blog post
SketchUp is a trademark of Trimble Inc. Cursor is a trademark of Anysphere Inc. All trademarks, logos, and brand names mentioned or shown in the blog post belong to their respective owners. This project is not affiliated with or endorsed by Trimble or Anysphere.
CC BY-NC 4.0 2026 © Jasper Hartong.RSS